Mac php の複数バージョンを管理する方法
結論:phpbrewを利用する。
これが参考になりそう
$ curl -L -O https://github.com/phpbrew/phpbrew/releases/latest/download/phpbrew.phar
  % Total    % Received % Xferd  Average Speed   Time    Time     Time  Current
                                 Dload  Upload   Total   Spent    Left  Speed
100   138  100   138    0     0    267      0 --:--:-- --:--:-- --:--:--   267
100   634  100   634    0     0    646      0 --:--:-- --:--:-- --:--:--  619k
100  627k  100  627k    0     0   239k      0  0:00:02  0:00:02 --:--:--  731k
$ ls
Applications			PhpstormProjects		budget_execution
Applications (Parallels)	Pictures			cloud_sql_proxy
Desktop				Postman				java_error_in_pycharm_14726.log
Documents			Public				method.py
Downloads			PycharmProjects			myfunc.py
Dropbox				VirtualBox VMs			phpbrew.phar
Google ドライブ			WebstormProjects		td_budget
Library				account-classifier		toridoll-bugdet
Movies				algorithm.py			vagrant
Music				anaconda3
Parallels			budget-execution
$ chmod +x phpbrew.phar
$ sudo mv phpbrew.phar /usr/local/bin/phpbrew
Password:
$ phpbrew init
Using root: /Users/xxxxxxx/.phpbrew
Initialization successfully finished!
<=====================================================>
Phpbrew environment is initialized, required directories are created under

    /Users/xxxxxxx/.phpbrew

Paste the following line(s) to the end of your ~/.bashrc and start a
new shell, phpbrew should be up and fully functional from there:

    source /Users/xxxxxxx/.phpbrew/bashrc

To enable PHP version info in your shell prompt, please set PHPBREW_SET_PROMPT=1
in your `~/.bashrc` before you source `~/.phpbrew/bashrc`

    export PHPBREW_SET_PROMPT=1

To enable .phpbrewrc file searching, please export the following variable:

    export PHPBREW_RC_ENABLE=1


For further instructions, simply run `phpbrew` to see the help message.

Enjoy phpbrew at $HOME!!

<=====================================================>
$ echo 'source ~/.phpbrew/bashrc' >> ~/.bashrc
$ phpbrew lookup-prefix homebrew
Did you mean 'self-update'? [Y/n] Y
Updating phpbrew /usr/local/bin/phpbrew...
downloading via curl command
  % Total    % Received % Xferd  Average Speed   Time    Time     Time  Current
                                 Dload  Upload   Total   Spent    Left  Speed
100   138  100   138    0     0    416      0 --:--:-- --:--:-- --:--:--   416
100   634  100   634    0     0   1816      0 --:--:-- --:--:-- --:--:--  1816
100  627k  100  627k    0     0   215k      0  0:00:02  0:00:02 --:--:--  308k
Version updated.
Using root: /Users/xxxxxxx/.phpbrew
Initialization successfully finished!
<=====================================================>
Phpbrew environment is initialized, required directories are created under

    /Users/xxxxxxx/.phpbrew

Paste the following line(s) to the end of your ~/.bashrc and start a
new shell, phpbrew should be up and fully functional from there:

    source /Users/xxxxxxx/.phpbrew/bashrc

To enable PHP version info in your shell prompt, please set PHPBREW_SET_PROMPT=1
in your `~/.bashrc` before you source `~/.phpbrew/bashrc`

    export PHPBREW_SET_PROMPT=1

To enable .phpbrewrc file searching, please export the following variable:

    export PHPBREW_RC_ENABLE=1


For further instructions, simply run `phpbrew` to see the help message.

Enjoy phpbrew at $HOME!!

<=====================================================>
phpbrew - 1.26.0
cliframework core: 2.5.4
$
Catalinaを利用している場合は、5系が入らない。そこでシステム側へ無理やり
入れてあげる事にする。
$ curl -s https://php-osx.liip.ch/install.sh | bash -s 5.5
Detected macOS Catalina 10.15. All ok.
Get packager.tgz
Unpack packager.tgz
Please type in your password, as we want to install this into /usr/local
Password:
Start packager (may take some time) using /usr/bin/python2.7
downloading https://s3-eu-west-1.amazonaws.com/php-osx.liip.ch/install/5.5-10.10-frontenddev-latest.dat
downloading https://s3-eu-west-1.amazonaws.com/php-osx.liip.ch/install/5.5-10.10/frontenddev/5.5-10.10-frontenddev-5.5.38-20160831-100002.tar.bz2

Installing package 5.5-10.10-frontenddev into root /
./pkg/pre-install
pkg/pre-install
Skipping existing directory
Skipping existing directory usr/
Skipping existing directory usr/local/
Extracting usr/local/php5-5.5.38-20160831-100002/
Extracting usr/local/php5-5.5.38-20160831-100002/bin/
Extracting usr/local/php5-5.5.38-20160831-100002/entropy-php.conf
Extracting usr/local/php5-5.5.38-20160831-100002/etc/
Extracting usr/local/php5-5.5.38-20160831-100002/include/
Extracting usr/local/php5-5.5.38-20160831-100002/info/
Extracting usr/local/php5-5.5.38-20160831-100002/lib/
Extracting usr/local/php5-5.5.38-20160831-100002/libphp5.so
Extracting usr/local/php5-5.5.38-20160831-100002/php.d/
・
・
・
Extracting usr/local/php5-5.5.38-20160831-100002/bin/tsql
Extracting usr/local/php5-5.5.38-20160831-100002/bin/uconv
Extracting usr/local/php5-5.5.38-20160831-100002/bin/vacuumdb
Extracting usr/local/php5-5.5.38-20160831-100002/bin/wrjpgcom
Extracting usr/local/php5-5.5.38-20160831-100002/bin/xgettext
Extracting usr/local/php5-5.5.38-20160831-100002/bin/xslt-config
Extracting usr/local/php5-5.5.38-20160831-100002/bin/xsltproc
Executing post-install script /tmp/5.5-10.10-frontenddev-post-install
Create symlink /usr/local/php5/entropy-php.conf /etc/apache2/other/+php-osx.conf
Restarting Apache
AH00558: httpd: Could not reliably determine the server's fully qualified domain name, using MacBook-Pro.local. Set the 'ServerName' directive globally to suppress this message
Syntax OK
Finished.
$ export PATH=/usr/local/php5/bin:$PATH
$ php -v
PHP 5.5.38 (cli) (built: Aug 31 2016 09:57:16)
Copyright (c) 1997-2015 The PHP Group
Zend Engine v2.5.0, Copyright (c) 1998-2015 Zend Technologies
    with Zend OPcache v7.0.6-dev, Copyright (c) 1999-2015, by Zend Technologies
    with Xdebug v2.2.5, Copyright (c) 2002-2014, by Derick Rethans
$ which php
/usr/local/php5/bin/php
パスを通す時は、
$ export PATH=/usr/local/php5/bin:$PATH
をしてあげる
おしまい
GCP GCEのプロジェクト間移動
参考:
qiita.com
スナップショット
gcloud compute disks snapshot [移行元インスタンス名] \
  --zone [移行元インスタンスのゾーン] \
  --snapshot-names [作成するスナップショット名] \
  --project [移行元プロジェクトID]
ディスク
gcloud compute disks create [作成するディスク名] \
  --zone [作成するディスクのゾーン] \
  --source-snapshot [作成したスナップショット名] \
  --project [移行元プロジェクトID]
イメージ
gcloud compute images create [作成するイメージ名] \
  --source-disk [作成したディスク名] \
  --source-disk-zone [作成したディスクのゾーン] \
  --project [移行元プロジェクトID]
展開
gcloud compute instances create [移行先インスタンス名] \
  --zone [移行先インスタンスのゾーン] \
  --image [作成したイメージ名] \
  --image-project [移行元プロジェクトID] \
  --project [移行先プロジェクトID]
WSLのビープ音を消すぞ
UbuntuでSambaを立ててWindowsServerからつないでみたの巻
仕事でSambaサーバ立ててWindowsServerから繋ぐ事になった。
Ubuntu 16.04 LTS
Windows Server 2019
apt-get install samba
samba の設定ファイルsmb.confを編集する
#
# Sample configuration file for the Samba suite for Debian GNU/Linux.
#
#
# This is the main Samba configuration file. You should read the
# smb.conf(5) manual page in order to understand the options listed
# here. Samba has a huge number of configurable options most of which
# are not shown in this example
#
# Some options that are often worth tuning have been included as
# commented-out examples in this file.
#  - When such options are commented with ";", the proposed setting
#    differs from the default Samba behaviour
#  - When commented with "#", the proposed setting is the default
#    behaviour of Samba but the option is considered important
#    enough to be mentioned here
#
# NOTE: Whenever you modify this file you should run the command
# "testparm" to check that you have not made any basic syntactic
# errors.

#======================= Global Settings =======================

[global]
   unix charset = UTF-8      <------<<<<<<<<<<<追加>
   dos charset = CP932      <------<<<<<<<<<<<追加>
## Browsing/Identification ###

# Change this to the workgroup/NT-domain name your Samba server will part of
   workgroup = WORKGROUP

# server string is the equivalent of the NT Description field
   server string = %h server (Samba, Ubuntu)

# Windows Internet Name Serving Support Section:
# WINS Support - Tells the NMBD component of Samba to enable its WINS Server
#   wins support = no

# WINS Server - Tells the NMBD components of Samba to be a WINS Client
# Note: Samba can be either a WINS Server, or a WINS Client, but NOT both
;   wins server = w.x.y.z

# This will prevent nmbd to search for NetBIOS names through DNS.
   dns proxy = no

#### Networking ####

# The specific set of interfaces / networks to bind to
# This can be either the interface name or an IP address/netmask;
# interface names are normally preferred
   interfaces = 127.0.0.0/8 10.0.0.0/16      <------<<<<<<<<<<<<編集>

# Only bind to the named interfaces and/or networks; you must use the
# 'interfaces' option above to use this.
# It is recommended that you enable this feature if your Samba machine is
# not protected by a firewall or is a firewall itself.  However, this
# option cannot handle dynamic or non-broadcast interfaces correctly.
   bind interfaces only = yes


#### Debugging/Accounting ####

# This tells Samba to use a separate log file for each machine
# that connects
   log file = /var/log/samba/log.%m

# Cap the size of the individual log files (in KiB).
   max log size = 1000

# If you want Samba to only log through syslog then set the following
# parameter to 'yes'.
#   syslog only = no

# We want Samba to log a minimum amount of information to syslog. Everything
# should go to /var/log/samba/log.{smbd,nmbd} instead. If you want to log
# through syslog you should set the following parameter to something higher.
   syslog = 0

# Do something sensible when Samba crashes: mail the admin a backtrace
   panic action = /usr/share/samba/panic-action %d


####### Authentication #######

# Server role. Defines in which mode Samba will operate. Possible
# values are "standalone server", "member server", "classic primary
# domain controller", "classic backup domain controller", "active
# directory domain controller".
#
# Most people will want "standalone sever" or "member server".
# Running as "active directory domain controller" will require first
# running "samba-tool domain provision" to wipe databases and create a
# new domain.
   server role = standalone server

# If you are using encrypted passwords, Samba will need to know what
# password database type you are using.
   passdb backend = tdbsam

   obey pam restrictions = yes

# This boolean parameter controls whether Samba attempts to sync the Unix
# password with the SMB password when the encrypted SMB password in the
# passdb is changed.
   unix password sync = yes

# For Unix password sync to work on a Debian GNU/Linux system, the following
# parameters must be set (thanks to Ian Kahan <<kahan@informatik.tu-muenchen.de> for
# sending the correct chat script for the passwd program in Debian Sarge).
   passwd program = /usr/bin/passwd %u
   passwd chat = *Enter\snew\s*\spassword:* %n\n *Retype\snew\s*\spassword:* %n\n *password\supdated\ssuccessfully* .

# This boolean controls whether PAM will be used for password changes
# when requested by an SMB client instead of the program listed in
# 'passwd program'. The default is 'no'.
   pam password change = yes

# This option controls how unsuccessful authentication attempts are mapped
# to anonymous connections
   map to guest = never      <------<<<<<<<<<<<<編集>

########## Domains ###########

#
# The following settings only takes effect if 'server role = primary
# classic domain controller', 'server role = backup domain controller'
# or 'domain logons' is set
#

# It specifies the location of the user's
# profile directory from the client point of view) The following
# required a [profiles] share to be setup on the samba server (see
# below)
;   logon path = \\%N\profiles\%U
# Another common choice is storing the profile in the user's home directory
# (this is Samba's default)
#   logon path = \\%N\%U\profile

# The following setting only takes effect if 'domain logons' is set
# It specifies the location of a user's home directory (from the client
# point of view)
;   logon drive = H:
#   logon home = \\%N\%U

# The following setting only takes effect if 'domain logons' is set
# It specifies the script to run during logon. The script must be stored
# in the [netlogon] share
# NOTE: Must be store in 'DOS' file format convention
;   logon script = logon.cmd

# This allows Unix users to be created on the domain controller via the SAMR
# RPC pipe.  The example command creates a user account with a disabled Unix
# password; please adapt to your needs
; add user script = /usr/sbin/adduser --quiet --disabled-password --gecos "" %u

# This allows machine accounts to be created on the domain controller via the
# SAMR RPC pipe.
# The following assumes a "machines" group exists on the system
; add machine script  = /usr/sbin/useradd -g machines -c "%u machine account" -d /var/lib/samba -s /bin/false %u

# This allows Unix groups to be created on the domain controller via the SAMR
# RPC pipe.
; add group script = /usr/sbin/addgroup --force-badname %g

############ Misc ############

# Using the following line enables you to customise your configuration
# on a per machine basis. The %m gets replaced with the netbios name
# of the machine that is connecting
;   include = /home/samba/etc/smb.conf.%m

# Some defaults for winbind (make sure you're not using the ranges
# for something else.)
;   idmap uid = 10000-20000
;   idmap gid = 10000-20000
;   template shell = /bin/bash

# Setup usershare options to enable non-root users to share folders
# with the net usershare command.

# Maximum number of usershare. 0 (default) means that usershare is disabled.
;   usershare max shares = 100

# Allow users who've been granted usershare privileges to create
# public shares, not just authenticated ones
   usershare allow guests = yes

#======================= Share Definitions =======================

# Un-comment the following (and tweak the other settings below to suit)
# to enable the default home directory shares. This will share each
# user's home directory as \\server\username
;[homes]
;   comment = Home Directories
;   browseable = no

# By default, the home directories are exported read-only. Change the
# next parameter to 'no' if you want to be able to write to them.
;   read only = yes

# File creation mask is set to 0700 for security reasons. If you want to
# create files with group=rw permissions, set next parameter to 0775.
;   create mask = 0700

# Directory creation mask is set to 0700 for security reasons. If you want to
# create dirs. with group=rw permissions, set next parameter to 0775.
;   directory mask = 0700

# By default, \\server\username shares can be connected to by anyone
# with access to the samba server.
# Un-comment the following parameter to make sure that only "username"
# can connect to \\server\username
# This might need tweaking when using external authentication schemes
;   valid users = %S

# Un-comment the following and create the netlogon directory for Domain Logons
# (you need to configure Samba to act as a domain controller too.)
;[netlogon]
;   comment = Network Logon Service
;   path = /home/samba/netlogon
;   guest ok = yes
;   read only = yes

# Un-comment the following and create the profiles directory to store
# users profiles (see the "logon path" option above)
# (you need to configure Samba to act as a domain controller too.)
# The path below should be writable by all users so that their
# profile directory may be created the first time they log on
;[profiles]
;   comment = Users profiles
;   path = /home/samba/profiles
;   guest ok = no
;   browseable = no
;   create mask = 0600
;   directory mask = 0700

[printers]
   comment = All Printers
   browseable = no
   path = /var/spool/samba
   printable = yes
   guest ok = no
   read only = yes
   create mask = 0700

# Windows clients look for this share name as a source of downloadable
# printer drivers
[print$]
   comment = Printer Drivers
   path = /var/lib/samba/printers
   browseable = yes
   read only = yes
   guest ok = no
# Uncomment to allow remote administration of Windows print drivers.
# You may need to replace 'lpadmin' with the name of the group your
# admin users are members of.
# Please note that you also need to set appropriate Unix permissions
# to the drivers directory for these users to have write rights in it
;   write list = root, @lpadmin

#[packages]
#   comment = nuget package
#   path = /mnt/gcs
#   writable = yes
#
#   #guest access OK
#   guest ok = yes
#
#   create mask = 0777
#   directory mask = 0777

[share]      <------<<<<<<<<<<<<ここから下追加>
   path = /mnt/share
   writable = yes
   guest ok = yes
   guest only = yes
   create mode = 0777
   directory mode = 0777
pdbedit でユーザー登録して再起動
root@fuseproxy:/etc/samba# pdbedit -a guest
new password:
retype new password:
Unix username:        guest
NT username:
Account Flags:        [U          ]
User SID:             S-1-5-21-338252857-148145190-3410117317-1000
Primary Group SID:    S-1-5-21-338252857-148145190-3410117317-513
Full Name:
Home Directory:       \\fuseproxy\guest
HomeDir Drive:
Logon Script:
Profile Path:         \\fuseproxy\guest\profile
Domain:               FUSEPROXY
Account desc:
Workstations:
Munged dial:
Logon time:           0
Logoff time:          Wed, 06 Feb 2036 15:06:39 UTC
Kickoff time:         Wed, 06 Feb 2036 15:06:39 UTC
Password last set:    Fri, 21 Aug 2020 21:55:49 UTC
Password can change:  Fri, 21 Aug 2020 21:55:49 UTC
Password must change: never
Last bad password   : 0
Bad password count  : 0
Logon hours         : FFFFFFFFFFFFFFFFFFFFFFFFFFFFFFFFFFFFFFFFFF
root@fuseproxy:/etc/samba# /etc/init.d/samba restart
[ ok ] Restarting nmbd (via systemctl): nmbd.service.
[ ok ] Restarting smbd (via systemctl): smbd.service.
[ ok ] Restarting samba-ad-dc (via systemctl): samba-ad-dc.service.
root@fuseproxy:/etc/samba#
できれば確認の際に
・セキュアOS(SELinux, AppArmor)も無効化
・WindowsSever側のファイアウォールも無効化
しておくことをお奨めしておきます。
あとWindowsSreverの場合、SMBクライアントも入れておいた方がいいかもです。

Windows側でnetwork login credentialsを設定して
うまくつながった!!


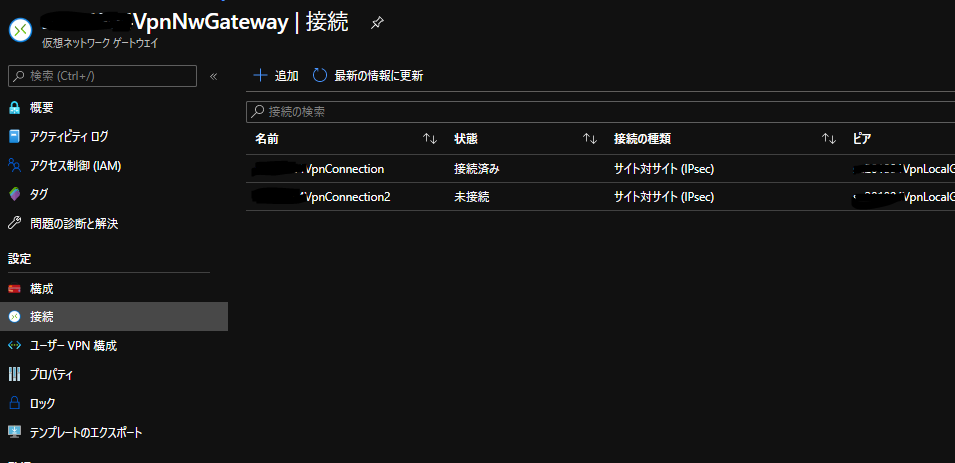
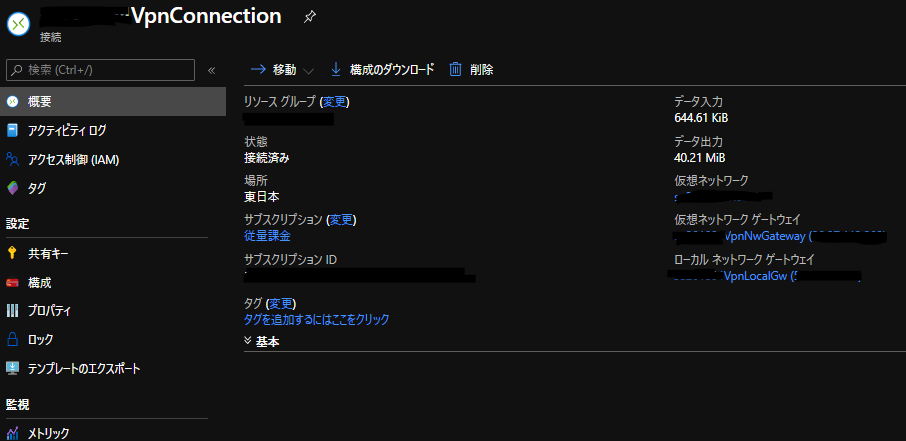
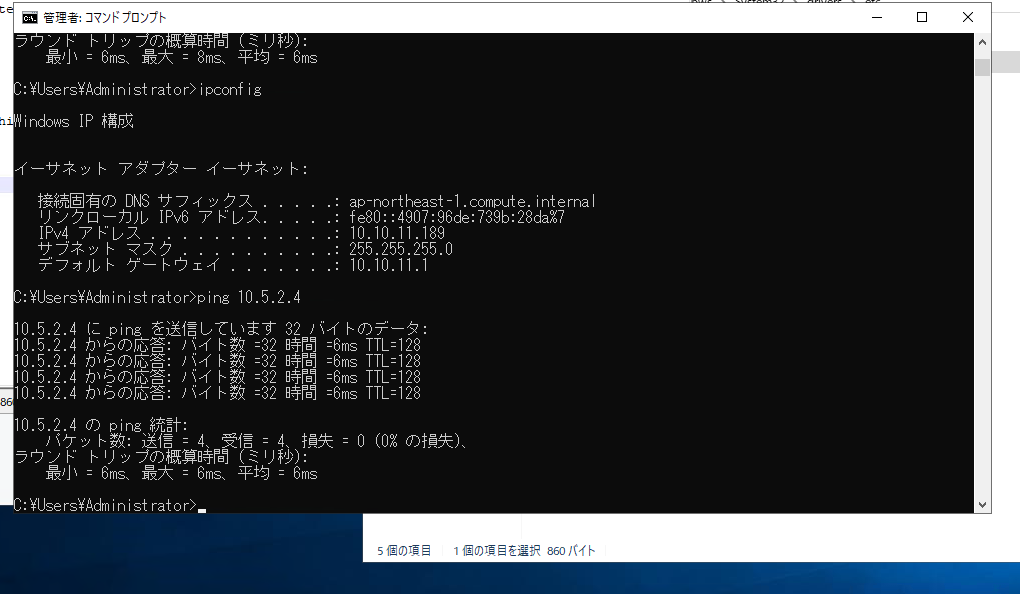
Azure - AWS間で S2S VPNを張ってみた。
とある案件でS2Svpnの技術検証をすることになったので
やってみた。
参考にさせて頂きました。ありがとうございます。
dev.classmethod.jp
dev.classmethod.jp
VPN接続設定
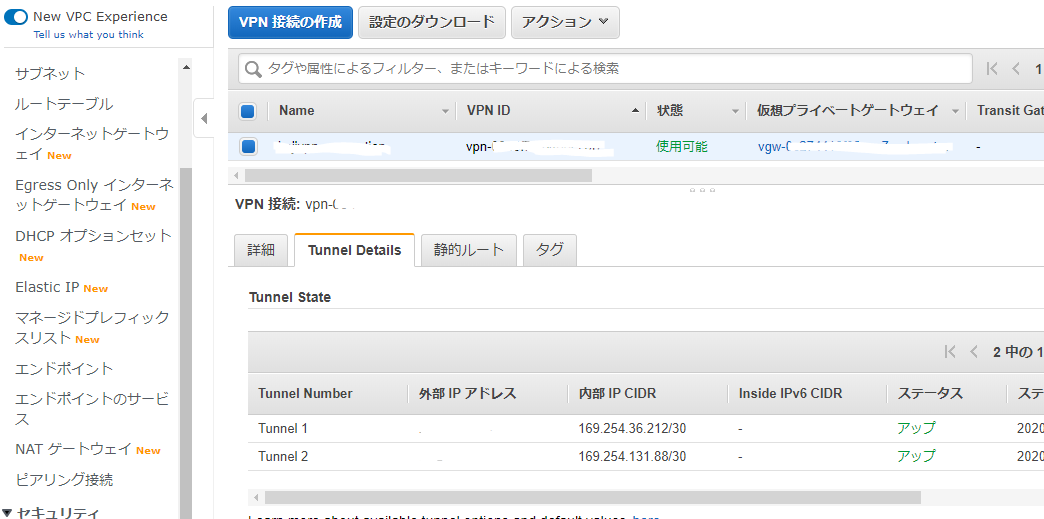
AWS側作業:VPN接続設定
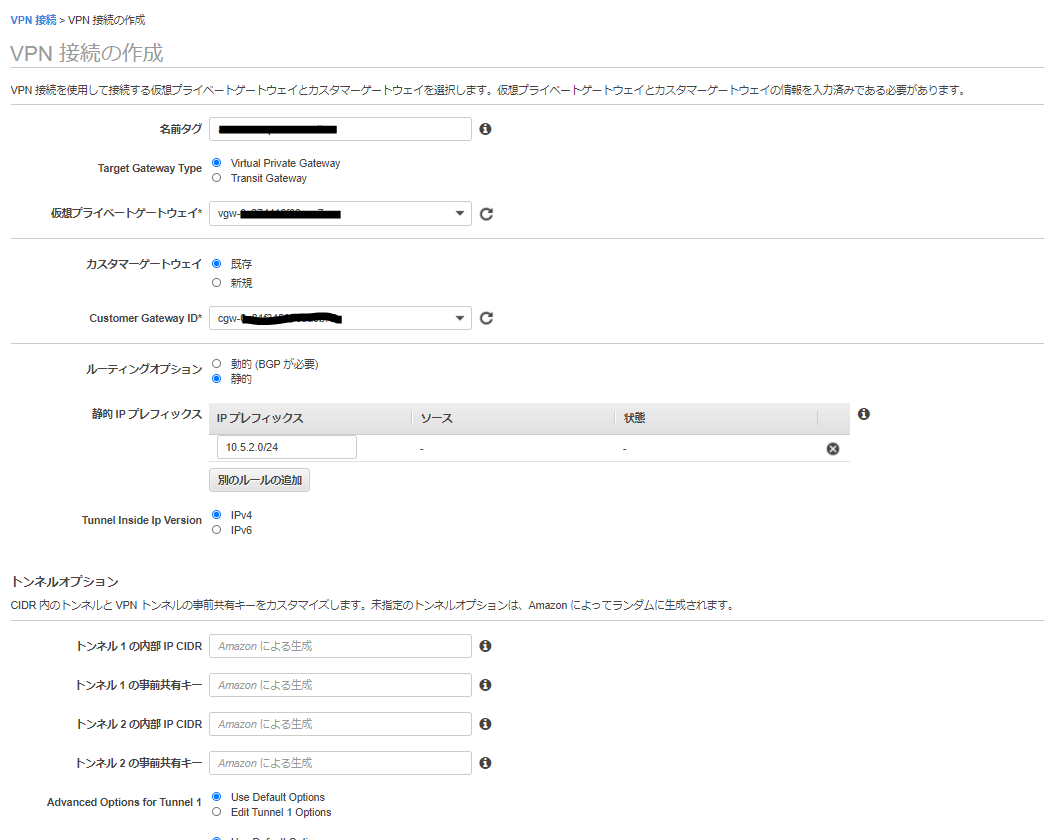
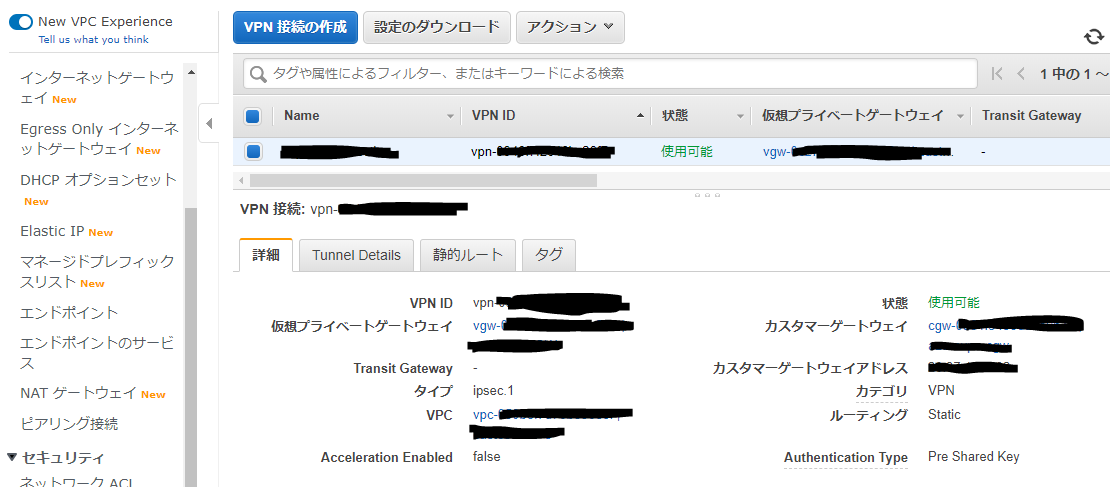
AWSのサイト間 VPN接続はデフォルトで冗長化されており、 2つのトンネル (2つのVPNルータ) が作成されます。
それぞれの VPNルータの設定を取得し、後述のAzure側作業で使用します。 設定のダウンロード から適当なConfigファイルをダウンロードします。
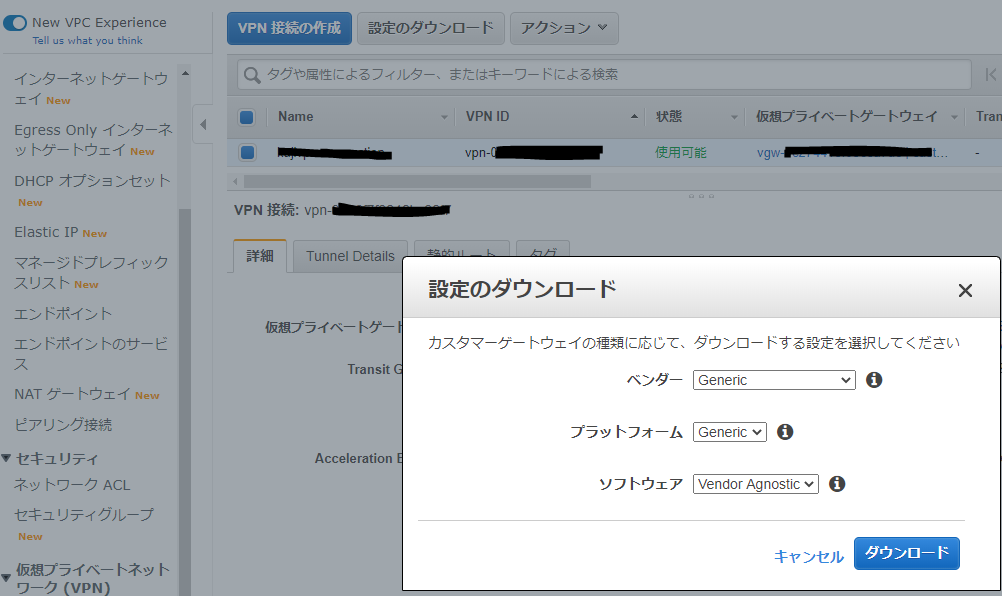
ダウンロードしたファイルの中身はこんな感じです。
Amazon Web Services
Virtual Private Cloud

VPN Connection Configuration
================================================================================
AWS utilizes unique identifiers to manipulate the configuration of
a VPN Connection. Each VPN Connection is assigned a VPN Connection Identifier
and is associated with two other identifiers, namely the
Customer Gateway Identifier and the Virtual Private Gateway Identifier.

Your VPN Connection ID		         : vpn-xxxxxxxxxxxxxxxxxxxxx
Your Virtual Private Gateway ID          : vgw-xxxxxxxxxxxxxxxxxxxxx
Your Customer Gateway ID    		 : cgw-xxxxxxxxxxxxxxxxxxxxx

A VPN Connection consists of a pair of IPSec tunnel security associations (SAs).
It is important that both tunnel security associations be configured.


IPSec Tunnel #1
================================================================================
#1: Internet Key Exchange Configuration

Configure the IKE SA as follows:
Please note, these sample configurations are for the minimum requirement of AES128, SHA1, and DH Group 2.
Category "VPN" connections in the GovCloud region have a minimum requirement of AES128, SHA2, and DH Group 14.
You will need to modify these sample configuration files to take advantage of AES256, SHA256, or other DH groups like 2, 14-18, 22, 23, and 24.
NOTE: If you customized tunnel options when creating or modifying your VPN connection, you may need to modify these sample configurations to match the custom settings for your tunnels.

Higher parameters are only available for VPNs of category "VPN," and not for "VPN-Classic".
The address of the external interface for your customer gateway must be a static address.
Your customer gateway may reside behind a device performing network address translation (NAT).
To ensure that NAT traversal (NAT-T) can function, you must adjust your firewall !rules to unblock UDP port 4500. If not behind NAT, we recommend disabling NAT-T.
  - IKE version              : IKEv1
  - Authentication Method    : Pre-Shared Key
  - Pre-Shared Key           : xxxxxxxxxxxxxxxxxxxxx
  - Authentication Algorithm : sha1
  - Encryption Algorithm     : aes-128-cbc
  - Lifetime                 : 28800 seconds
  - Phase 1 Negotiation Mode : main
  - Diffie-Hellman           : Group 2

#2: IPSec Configuration

Configure the IPSec SA as follows:
Category "VPN" connections in the GovCloud region have a minimum requirement of AES128, SHA2, and DH Group 14.
Please note, you may use these additionally supported IPSec parameters for encryption like AES256 and other DH groups like 2, 5, 14-18, 22, 23, and 24.
NOTE: If you customized tunnel options when creating or modifying your VPN connection, you may need to modify these sample configurations to match the custom settings for your tunnels.

Higher parameters are only available for VPNs of category "VPN," and not for "VPN-Classic".
  - Protocol                 : esp
  - Authentication Algorithm : hmac-sha1-96
  - Encryption Algorithm     : aes-128-cbc
  - Lifetime                 : 3600 seconds
  - Mode                     : tunnel
  - Perfect Forward Secrecy  : Diffie-Hellman Group 2

IPSec Dead Peer Detection (DPD) will be enabled on the AWS Endpoint. We
recommend configuring DPD on your endpoint as follows:
  - DPD Interval             : 10
  - DPD Retries              : 3

IPSec ESP (Encapsulating Security Payload) inserts additional
headers to transmit packets. These headers require additional space,
which reduces the amount of space available to transmit application data.
To limit the impact of this behavior, we recommend the following
configuration on your Customer Gateway:
  - TCP MSS Adjustment       : 1379 bytes
  - Clear Don't Fragment Bit : enabled
  - Fragmentation            : Before encryption

#3: Tunnel Interface Configuration

Your Customer Gateway must be configured with a tunnel interface that is
associated with the IPSec tunnel. All traffic transmitted to the tunnel
interface is encrypted and transmitted to the Virtual Private Gateway.


The Customer Gateway and Virtual Private Gateway each have two addresses that relate
to this IPSec tunnel. Each contains an outside address, upon which encrypted
traffic is exchanged. Each also contain an inside address associated with
the tunnel interface.

The Customer Gateway outside IP address was provided when the Customer Gateway
was created. Changing the IP address requires the creation of a new
Customer Gateway.

The Customer Gateway inside IP address should be configured on your tunnel
interface.

Outside IP Addresses:
  - Customer Gateway 		        : xxx.xxx.xxx.xxx
  - Virtual Private Gateway	        : xxx.xxx.xxx.xxx

Inside IP Addresses
  - Customer Gateway         		: xxx.xxx.xxx.xxx/xx
  - Virtual Private Gateway             : xxx.xxx.xxx.xxx/xx

Configure your tunnel to fragment at the optimal size:
  - Tunnel interface MTU     : 1436 bytes


#4: Static Routing Configuration:

To route traffic between your internal network and your VPC,
you will need a static route added to your router.

Static Route Configuration Options:

  - Next hop       : xxx.xxx.xxx.xxx

You should add static routes towards your internal network on the VGW.
The VGW will then send traffic towards your internal network over
the tunnels.


IPSec Tunnel #2
================================================================================
#1: Internet Key Exchange Configuration

Configure the IKE SA as follows:
Please note, these sample configurations are for the minimum requirement of AES128, SHA1, and DH Group 2.
Category "VPN" connections in the GovCloud region have a minimum requirement of AES128, SHA2, and DH Group 14.
You will need to modify these sample configuration files to take advantage of AES256, SHA256, or other DH groups like 2, 14-18, 22, 23, and 24.
NOTE: If you customized tunnel options when creating or modifying your VPN connection, you may need to modify these sample configurations to match the custom settings for your tunnels.

Higher parameters are only available for VPNs of category "VPN," and not for "VPN-Classic".
The address of the external interface for your customer gateway must be a static address.
Your customer gateway may reside behind a device performing network address translation (NAT).
To ensure that NAT traversal (NAT-T) can function, you must adjust your firewall !rules to unblock UDP port 4500. If not behind NAT, we recommend disabling NAT-T.
  - IKE version              : IKEv1
  - Authentication Method    : Pre-Shared Key
  - Pre-Shared Key           : xxxxxxxxxxxxxxxxxxxxxxxxxxxxxx
  - Authentication Algorithm : sha1
  - Encryption Algorithm     : aes-128-cbc
  - Lifetime                 : 28800 seconds
  - Phase 1 Negotiation Mode : main
  - Diffie-Hellman           : Group 2

#2: IPSec Configuration

Configure the IPSec SA as follows:
Category "VPN" connections in the GovCloud region have a minimum requirement of AES128, SHA2, and DH Group 14.
Please note, you may use these additionally supported IPSec parameters for encryption like AES256 and other DH groups like 2, 5, 14-18, 22, 23, and 24.
NOTE: If you customized tunnel options when creating or modifying your VPN connection, you may need to modify these sample configurations to match the custom settings for your tunnels.

Higher parameters are only available for VPNs of category "VPN," and not for "VPN-Classic".
  - Protocol                 : esp
  - Authentication Algorithm : hmac-sha1-96
  - Encryption Algorithm     : aes-128-cbc
  - Lifetime                 : 3600 seconds
  - Mode                     : tunnel
  - Perfect Forward Secrecy  : Diffie-Hellman Group 2

IPSec Dead Peer Detection (DPD) will be enabled on the AWS Endpoint. We
recommend configuring DPD on your endpoint as follows:
  - DPD Interval             : 10
  - DPD Retries              : 3

IPSec ESP (Encapsulating Security Payload) inserts additional
headers to transmit packets. These headers require additional space,
which reduces the amount of space available to transmit application data.
To limit the impact of this behavior, we recommend the following
configuration on your Customer Gateway:
  - TCP MSS Adjustment       : 1379 bytes
  - Clear Don't Fragment Bit : enabled
  - Fragmentation            : Before encryption

#3: Tunnel Interface Configuration

Your Customer Gateway must be configured with a tunnel interface that is
associated with the IPSec tunnel. All traffic transmitted to the tunnel
interface is encrypted and transmitted to the Virtual Private Gateway.


The Customer Gateway and Virtual Private Gateway each have two addresses that relate
to this IPSec tunnel. Each contains an outside address, upon which encrypted
traffic is exchanged. Each also contain an inside address associated with
the tunnel interface.

The Customer Gateway outside IP address was provided when the Customer Gateway
was created. Changing the IP address requires the creation of a new
Customer Gateway.

The Customer Gateway inside IP address should be configured on your tunnel
interface.

Outside IP Addresses:
  - Customer Gateway 		        : xxx.xxx.xxx.xxx
  - Virtual Private Gateway	        : xxx.xxx.xxx.xxx

Inside IP Addresses
  - Customer Gateway         		: xxx.xxx.xxx.xxx/xx
  - Virtual Private Gateway             : xxx.xxx.xxx.xxx/xx

Configure your tunnel to fragment at the optimal size:
  - Tunnel interface MTU     : 1436 bytes


#4: Static Routing Configuration:

To route traffic between your internal network and your VPC,
you will need a static route added to your router.

Static Route Configuration Options:

  - Next hop       : xxx.xxx.xxx.xxx

You should add static routes towards your internal network on the VGW.
The VGW will then send traffic towards your internal network over
the tunnels.


Additional Notes and Questions
================================================================================

  - Amazon Virtual Private Cloud Getting Started Guide:
      http://docs.amazonwebservices.com/AmazonVPC/latest/GettingStartedGuide
  - Amazon Virtual Private Cloud Network Administrator Guide:
      http://docs.amazonwebservices.com/AmazonVPC/latest/NetworkAdminGuide
  - XSL Version: 2009-07-15-1119716
Configファイルの下記項目をメモしておきます。
IPsec Tunnel #1 のPreShared Key
IPsec Tunnel #1 のAWS側グローバルIP
IPsec Tunnel #2 のPreShared Key
IPsec Tunnel #2 のAWS側グローバルIP
バルミューダ 寺尾玄さん
この人の生き方は傍から見たら常軌を逸しているように見えるけど、
自分はカッコいいと思うし、憧れます。
ものを作りは結局そういうところから始まるんだよね。
こういう生き方はできなくても、少なくともこういう気概を持って生きていきたい。
